
Buyer Beware: Security Window Film Installation Errors, Photographed on Real Campuses
Every photo on this page was taken on a school campus where Epic was hired to correct a previous vendor’s security window film. Improper installation isn’t an aesthetic issue; it is a security issue. Here is what goes wrong, what right looks like, and the questions that would have prevented it.
7 min read · Updated 2026-10-02
Why this page exists
Texas’s school safety standards and the grant money behind them brought a wave of window-tinting companies into school security film — many from out of state, many with no experience installing thick security film with a structural attachment, and most gone by the time anything needs service. Some are reputable. Others consume limited safety funding and leave campuses vulnerable at exactly the openings the money was meant to harden. Epic put this fact sheet together in 2023 after being called in, again and again, to fix the results. The photos are real.
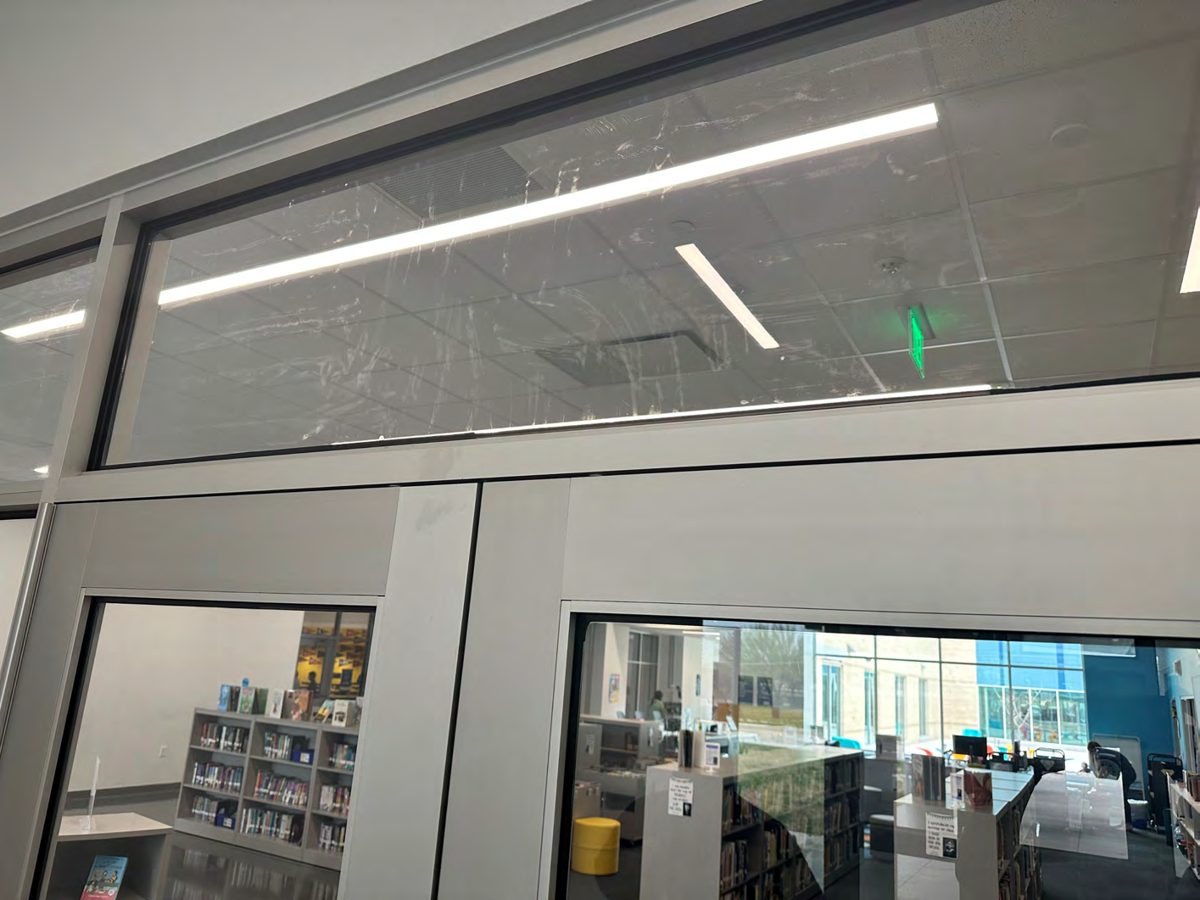
1. Trapped air and residue — a failed cure
Security film is far thicker than solar film and uses a water-based mounting solution with a much longer drying time. Without the right tools and technique, the heavy film traps air and residue and never cures flat.
What right looks like: Film squeegeed to a clear, dry bond with no haze, blisters or trapped solution. Thick films need specialised tools and a crew that installs them every day.
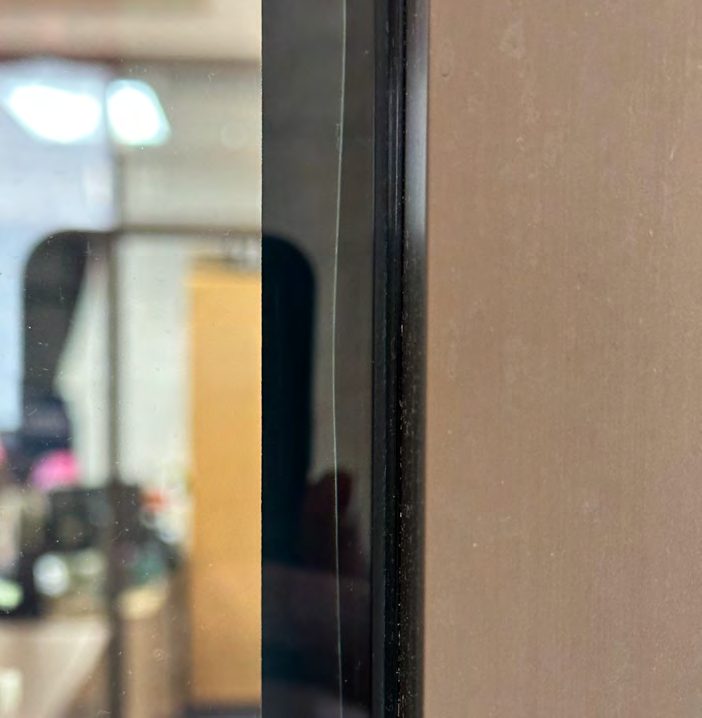
2. Hand-cut film, stopped short of the edge
Thick security film cut by hand instead of with the cutting tools the thickness requires leaves uneven edges — and here the film was stopped more than ½ in. short of the glass edge. The attachment has nothing to bond to, so the glass can leave the frame with the film still on it.
What right looks like: Film cut cleanly to the edge of the glass, with the structural silicone sealant attachment bridging film, glass and frame on every side.
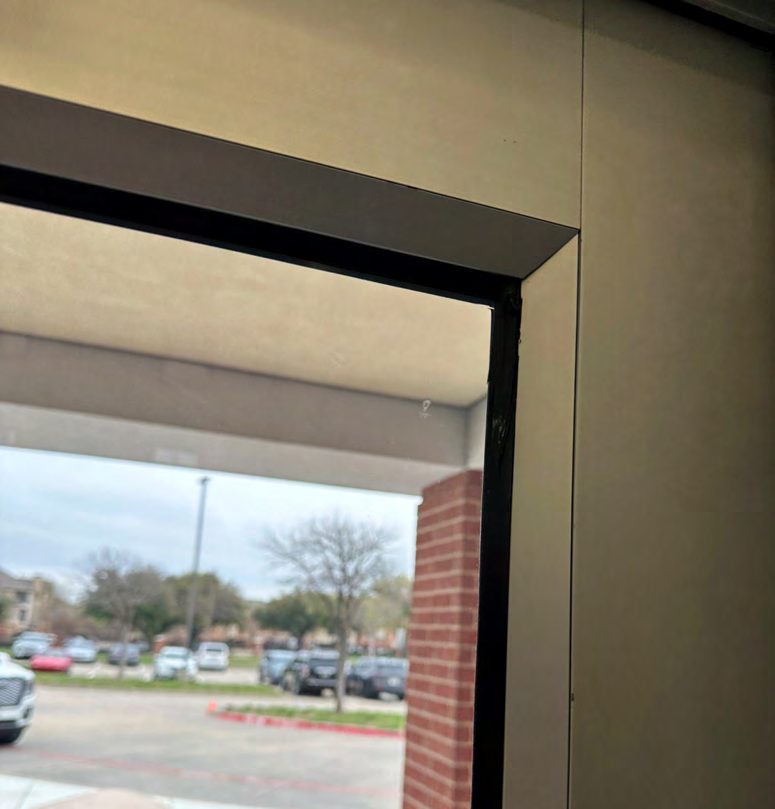
3. Attachment that stops and starts
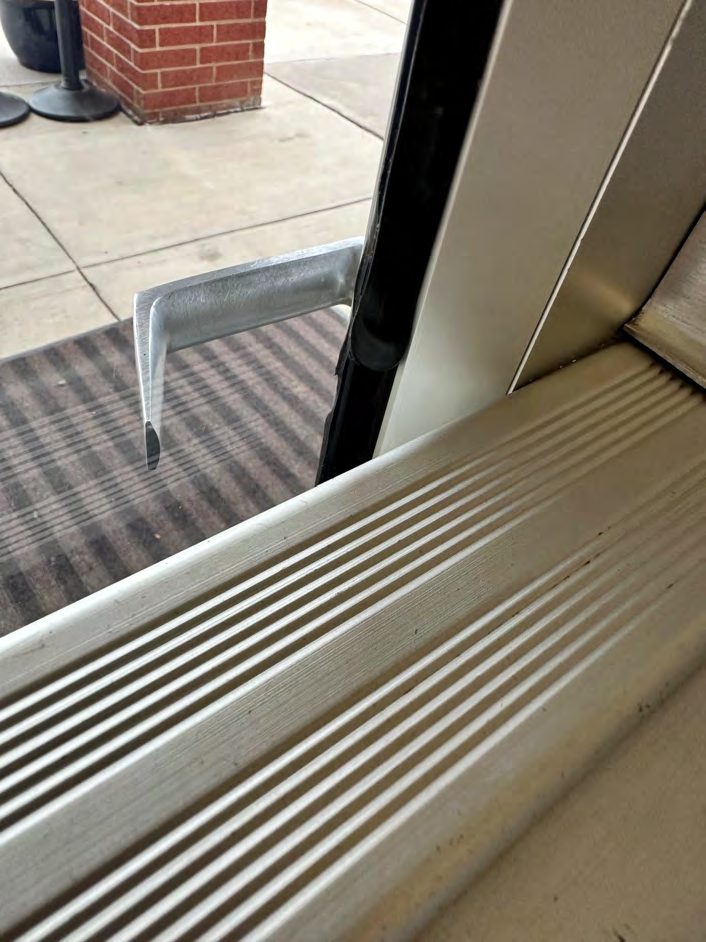
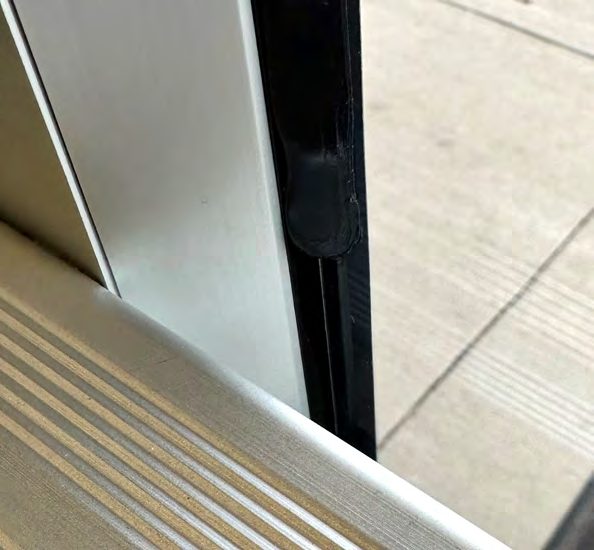
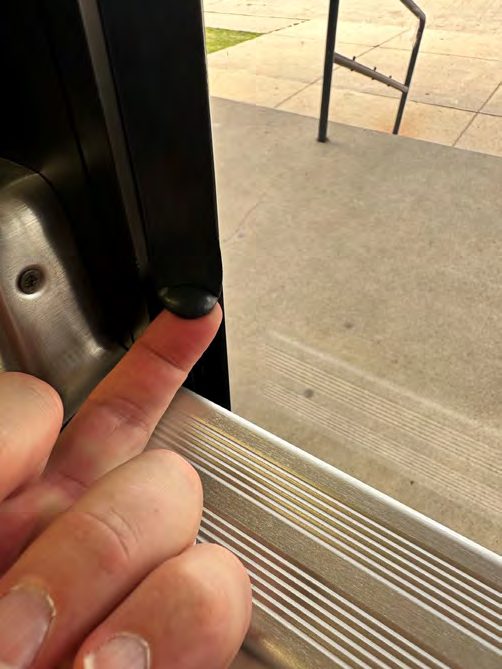
The attachment only works as a continuous anchor. Here the bead stopped 4 in. above a handle and started again 4 in. below it; elsewhere it skipped hinges and hardware. Untrained crews rush past obstacles instead of removing them.
What right looks like: Handles, hinges and anything else in the way come off before the film goes on. The bead runs continuously around the entire opening with no stoppage or gap.
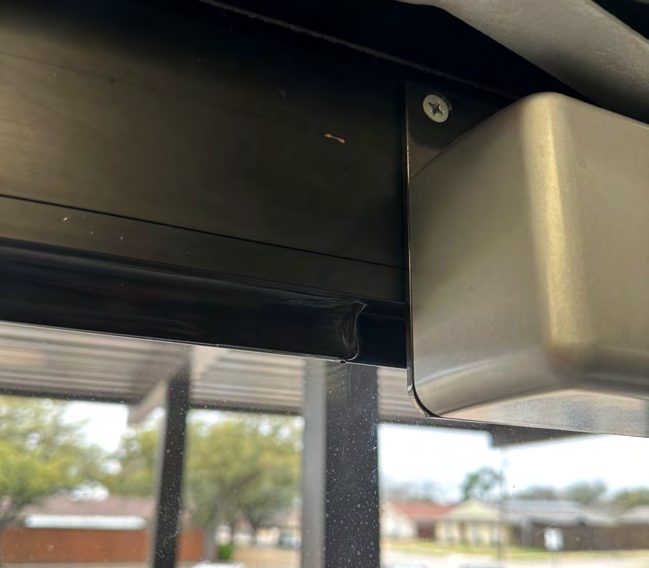
4. Attachment on the glass only
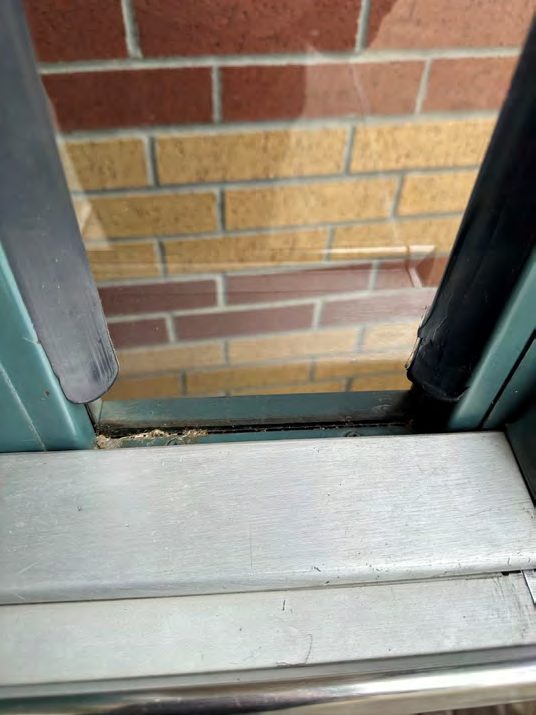
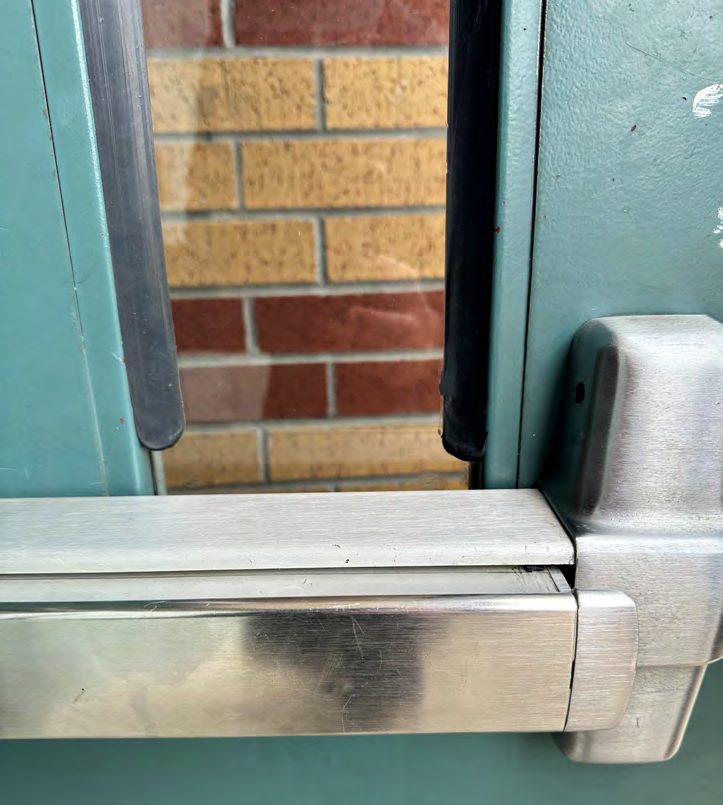
The attachment is designed to anchor the filmed glass to the frame. Both of these beads sit on the glass and never reach the frame — so nothing is anchored to anything.
What right looks like: The bead bridges onto the frame’s surface by at least ½ in. on every side; the frame, the glass and the film become one assembly.
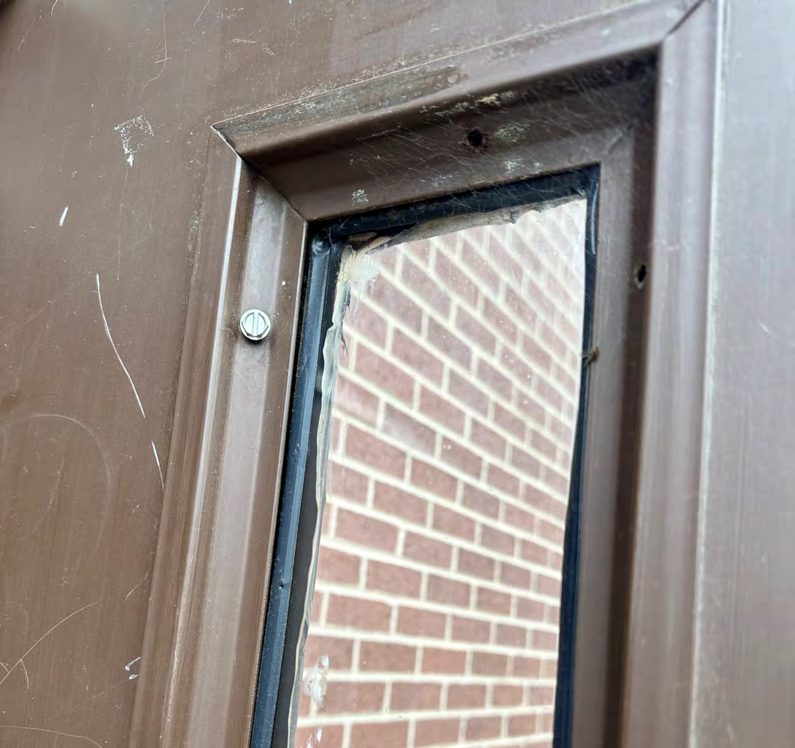
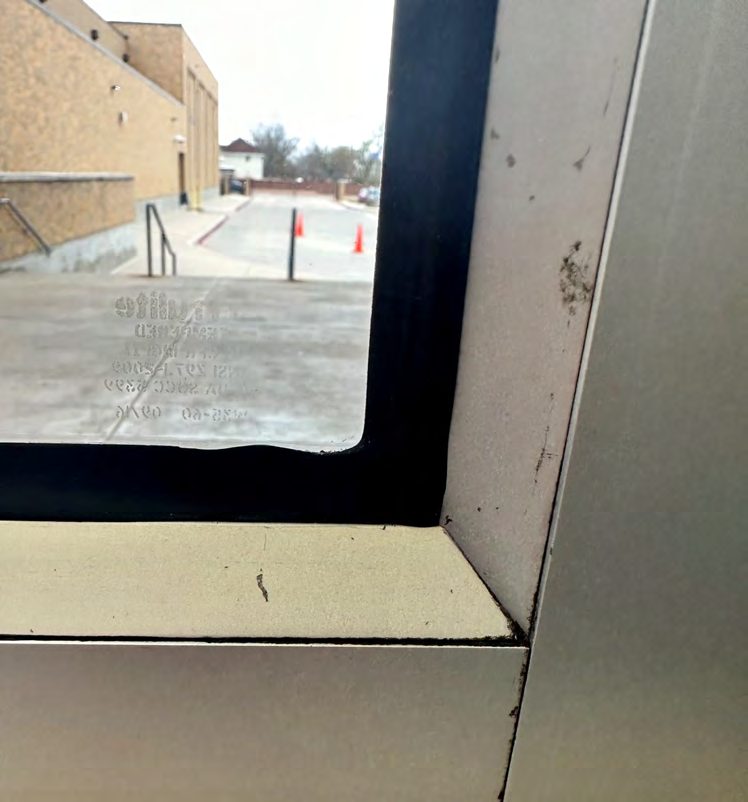
5. Attachment with no film — and a patch that isn’t one
In the first photo the installer ran attachment around a plastic lite and never installed security film at all. In the second, a “repair” was dabbed on with exposed edges and gaps instead of being tooled continuously against film and frame.
What right looks like: Security film on every glass lite, then the attachment. Repairs are tooled smoothly and continuously so the anchor is restored, not decorated.
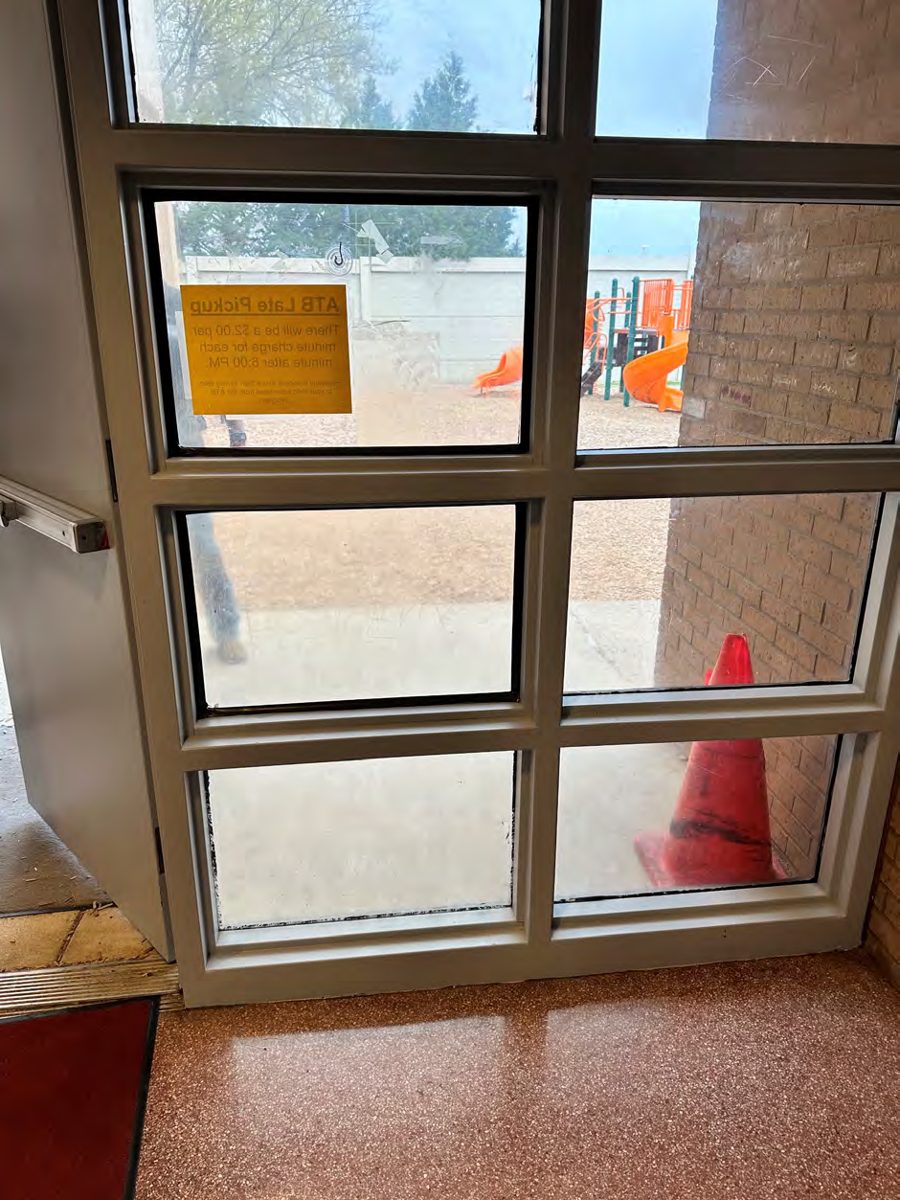
6. Sealant over the gasket — the “wet glaze” shortcut
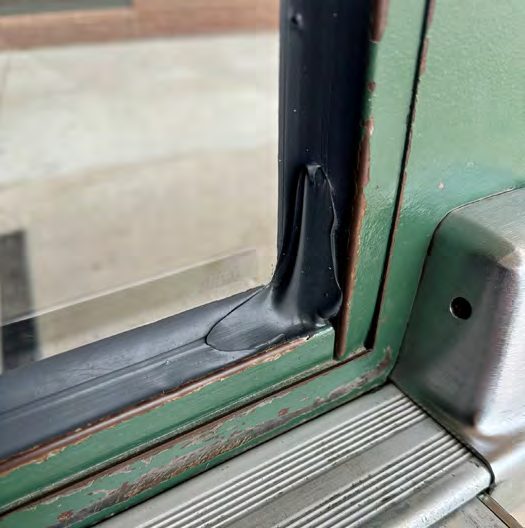
Most of the industry runs the bead over the top of the interior gasket. The gasket is a loose dry-glazing strip; sealant bonded to it is bonded to nothing structural. 3M’s guidance for that method still requires the bead to extend 3/8–½ in. beyond the gasket onto the frame with a triangular profile — and here it did neither, leaving a concave bead that peels off in one hand.
What right looks like: Epic removes the interior gasket, seats the glass on cork wedges and tools the sealant into the open glazing channel so it bonds to frame, glass and film with a mechanical interlock — the Epic Method.
7. A non-3M attachment on 3M film
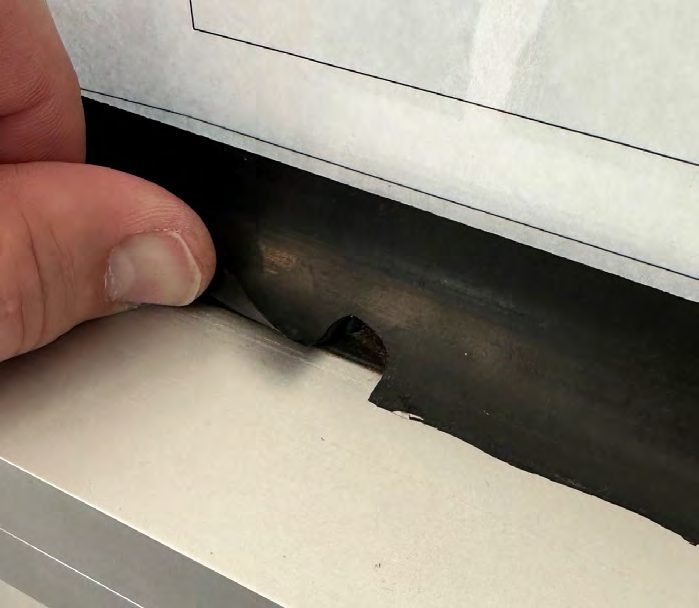
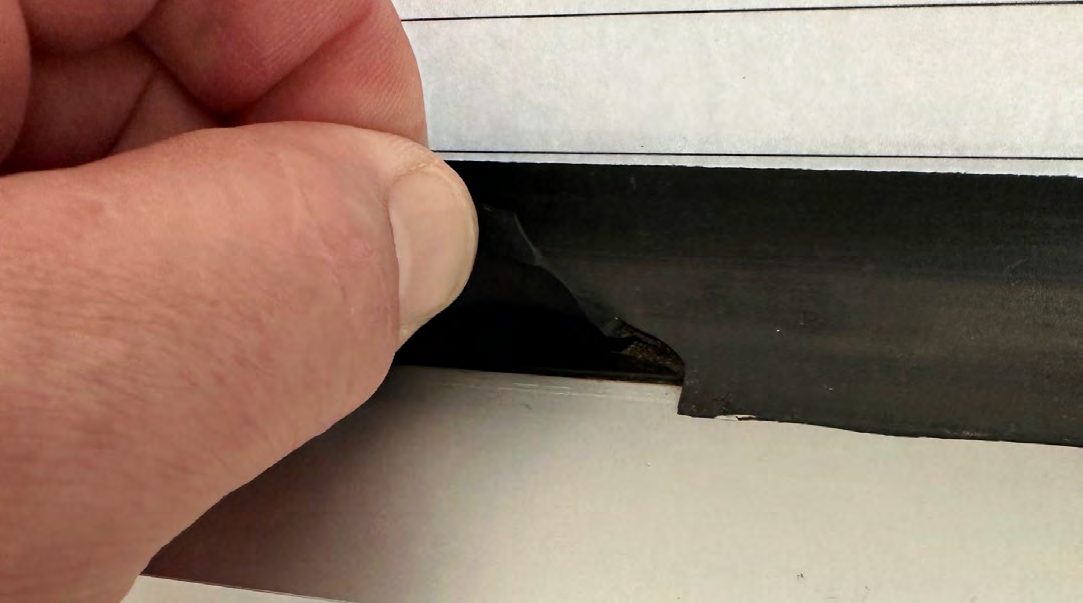
This district got genuine 3M security film and a bargain attachment. The adhesive failed and peeled, the installer scored the film while applying it, and air pockets pulled the film away from the glass. Worse: 3M does not warrant its security film when a non-3M attachment system is used with it, so the whole installation had to be replaced.
What right looks like: 3M film with the 3M-specified structural silicone sealant attachment, installed by a 3M-certified crew — the only combination that carries the 3M warranty.
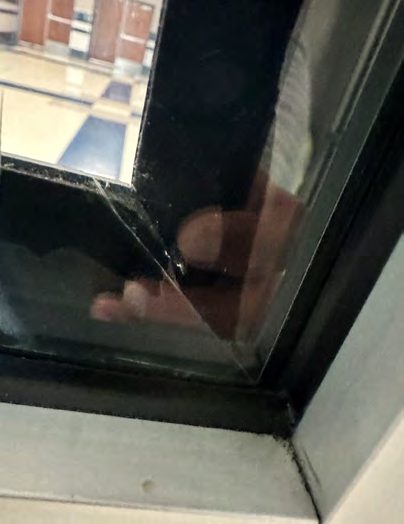
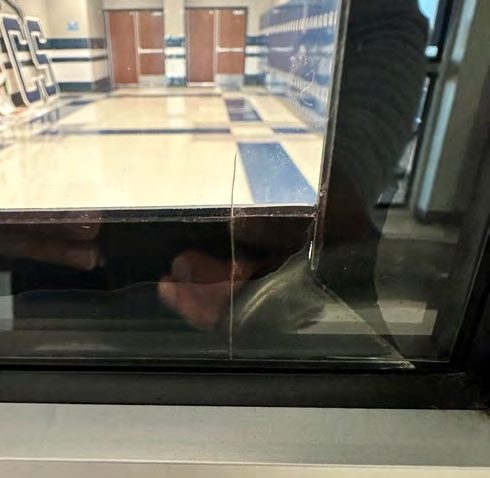
8. Bad tooling, wrong bead size
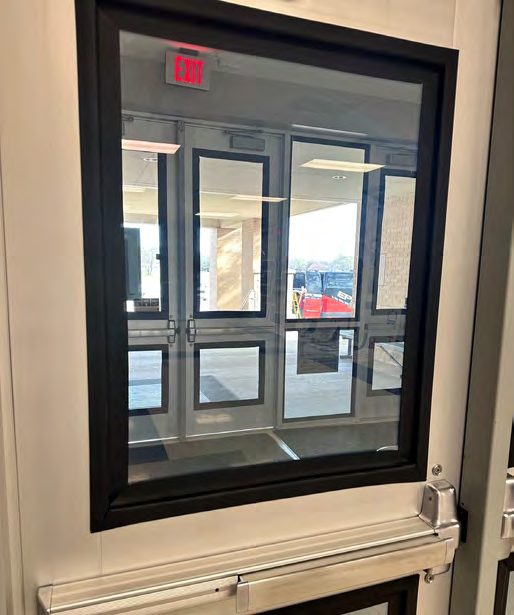
The sealant has to be tooled with continuous motion, positive pressure and bulk-dispensing equipment to wet out onto film and frame. These beads were under-sized and dragged, leaving poor adhesion and a visible gap between film and attachment.
What right looks like: A full, triangular bead (3/8 in. exposed on frame and on film) tooled in one continuous pass per side, starting in the corners.
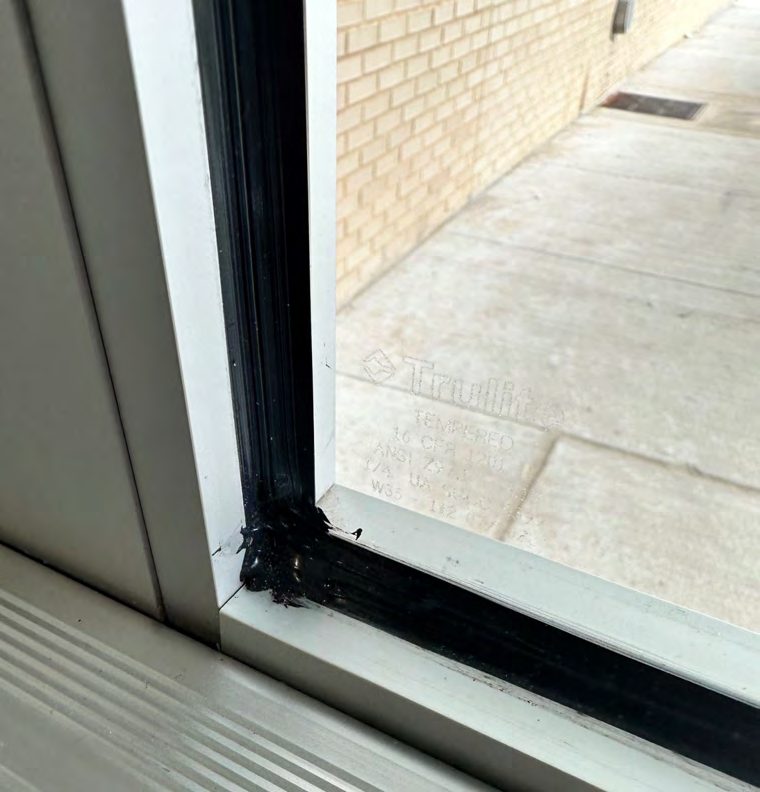
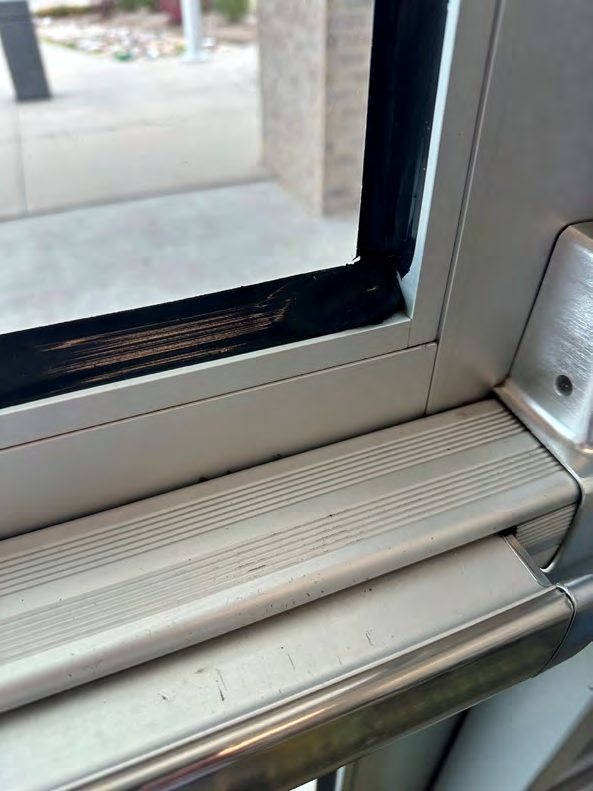
What a correct installation looks like
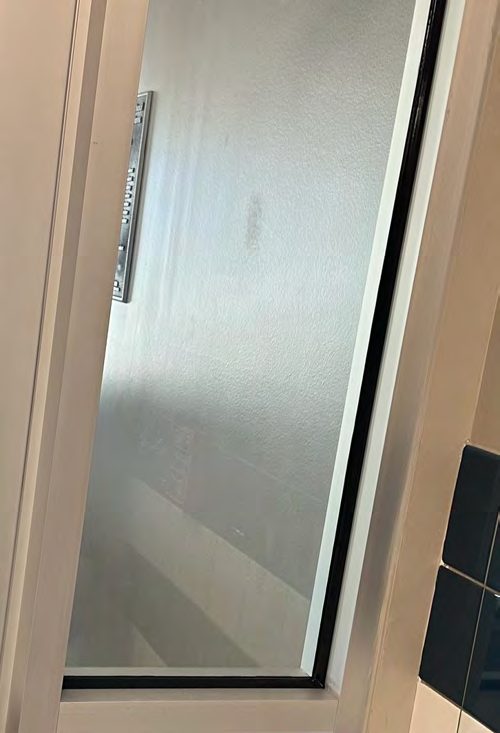
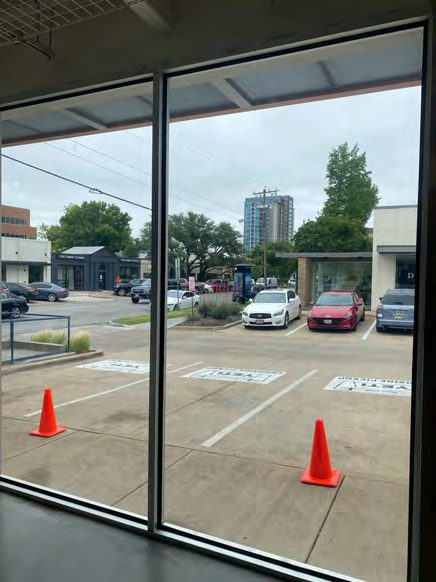
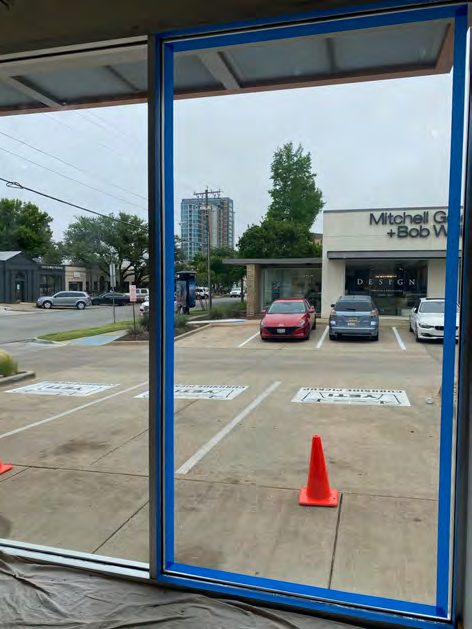
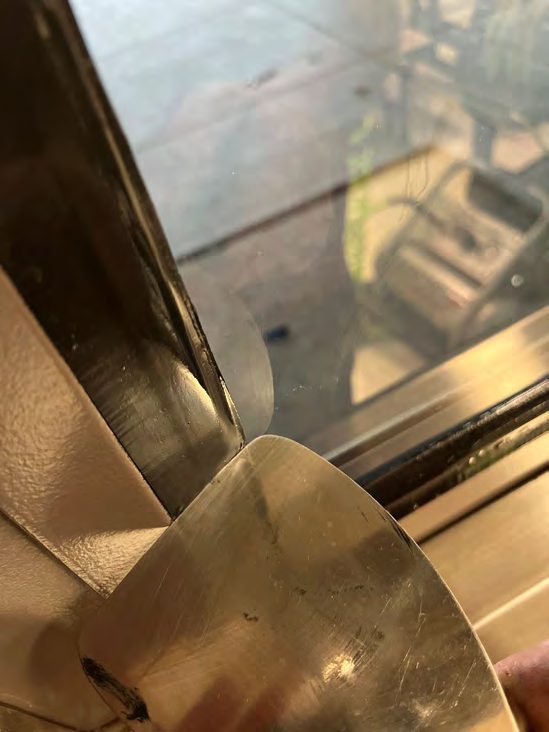
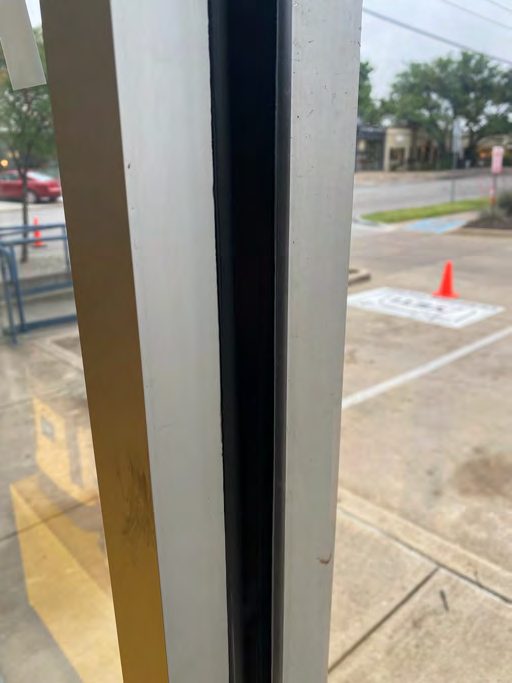
Every photo below is an Epic installation by Epic’s own Certified Installation Specialists: hardware removed and reinstalled, film to the edge of the glass, a continuous triangular bead of 3M-specified structural silicone sealant tooled in one pass per side and bridging frame, glass and film. On forced-entry work Epic goes one step further than the industry and removes the interior gasket so the sealant keys into the open glazing channel — the Epic Method.

Seven questions that would have prevented every photo above
- Which film, exactly — brand, product, thickness — and will it be installed to the edge of the glass?
- Which attachment, exactly? If it is not the 3M-specified structural silicone sealant, the 3M film warranty is void.
- Will hardware, handles and hinges be removed so the bead is continuous — and reinstalled afterward?
- Will the bead bridge onto the frame (not just the glass, not just the gasket) by at least ½ in. on every side?
- Is the bead tooled in one continuous pass with bulk-dispensing equipment, with a triangular profile?
- Who installs it — employees certified on this film, or subcontractors?
- Who answers the phone in three years when a pane is broken or a bead lifts?
Put the answers in the contract. Epic answers all seven in writing on every proposal, and the full version is in the security film buyer’s guide.
Already have film on your campus?
Epic will walk your entries with you, photograph what is there and tell you honestly whether it can be corrected or needs to be replaced — at no charge, whoever installed it. Request a campus survey →
Buyer Beware: security film installation errors (PDF)
The field photo addendum for your safety committee — every error on this page with the fix, the shortcut vs. the Epic Method step by step, the correct-installation photos and the seven questions, in a board-ready PDF.
Buyer beware questions
How can I tell if my school’s security film was installed correctly?
What does a bad security film installation cost a district?
Why do out-of-state installers show up after a safety mandate?
Can a bad installation be fixed without replacing everything?
Ready to see what’s possible on your glass?
A free on-site assessment. Measurements, film recommendation, and a written estimate — no pressure, no obligation.
 Cookies on epiccos.com
Follow the work
Real installs, real tests, real schools. Pick the feed you actually open — same crew, same standard everywhere.